Press release
•
April 23, 2023
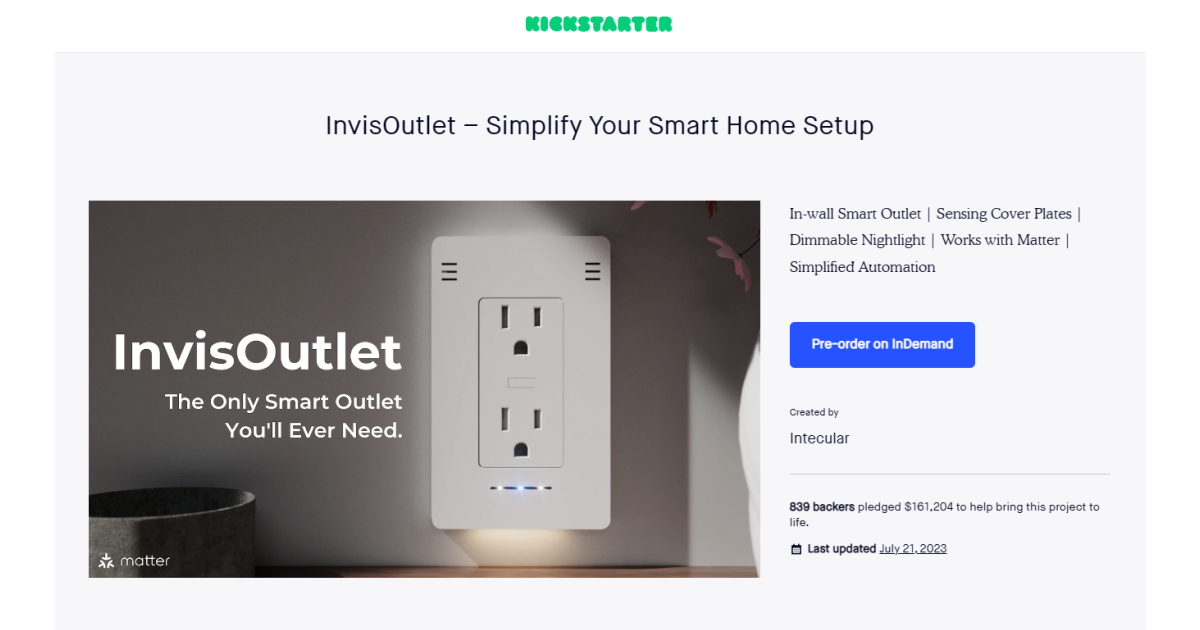
InvisOutlet Pro: The Ultimate Smart Outlet That Transforms Your Home Into A Smart Haven - Intecular
The InvisOutlet Pro by Intecular is a wall-integrated smart outlet that combines multiple sensors for streamlined home automation, including air quality monitoring, presence detection, and connectivity to WiFi and BLE devices, offering enhanced energy efficiency and security.